The Conductor Widget is the heart of the Conductor plugin. You tell the widget what content you want to display and how you want it to look when it’s on a page. Conductor stores this information in a widget, which means you can change the order, display, and location of your content on the fly!
You can add Conductor widgets from within your traditional WordPress dashboard or from the live front end Customizer of your website.
Adding the Conductor Widget from the Widgets Sub-panel
1. Go to your WordPress Dashboard.
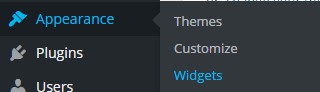
2. On the left sidebar hover over Appearance and then click on Widgets.
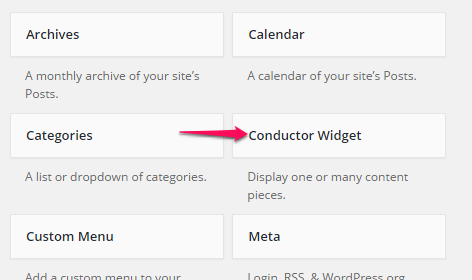
3, Click on the box labeled Conductor Widget.
4. Next choose where you’d like the widget to be then click Add Widget button in the bottom-right corner of the dropdown menu.

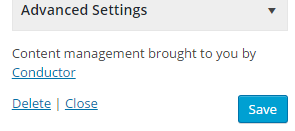
5. Now within the widget you can change all of the settings of the widget to your liking. When you finish that click the Save button in the bottom-right corner of the widget.
Note: You can add/remove and stack any number of widgets.
Adding the Conductor Widget Using the Live Customizer
1. Go to your WordPress Dashboard.
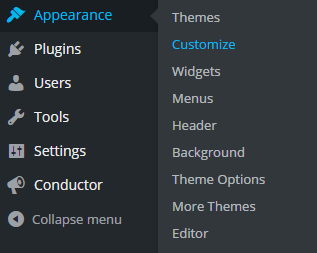
2. On the left sidebar hover over Appearance then click on Customize.
3. On the Customizer sidebar on the left click on Widgets.

4. Click on the option you’d like to add a widget to then click on the Add Widget button.
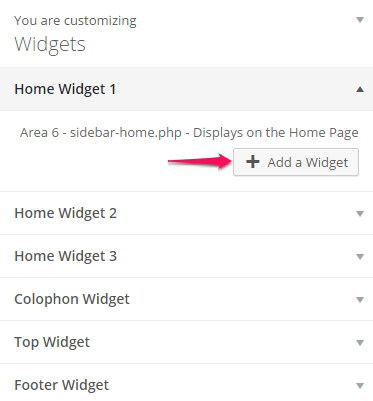
5. When the selection of widgets pops up click on the widget labeled Conductor Widget.

6. Now you should be able to edit all of the settings of the widget. When you are finished with the widget click the Save & Publish button in the top-right corner of the customizer sidebar.
Note: You can add/remove and stack any number of widgets.
![]()
Why do you want to do this?
The Conductor widget allows you to display Posts, Pages, and Categories from within your WordPress website. What developers refer to as “queries” is now easier than ever with no coding necessary and just a few clicks of a button.